How To Create a PDF In A WKWebView
In this article, we'll see how we can save the contents of a WKWebView as a PDF using Swift 5.
In this article, we'll take a look at how to save the contents of a WKWebView as a PDF.
Setting up the WKWebView
To get things started, let's create our WKWebView:
import WebKit

private lazy var webView: WKWebView = {
    // We'll go ahead and use the default configuration here.
    // There's some cool configuration options here, but not in scope.
    let webView = WKWebView(frame: .zero, configuration: WKWebViewConfiguration())

    // We'll need this to determine when the web page has fully loaded.
    webView.navigationDelegate = self

    view.addSubview(webView)
    webView.pinToSuperview()
    return webView
}()
Next, we'll have it show the webpage that we'll eventually convert into a PDF:
override func viewDidLoad() {
    super.viewDidLoad()
    loadURL(from: "https://www.digitalbunker.dev")
}

private func loadURL(from string: String) {
    guard let url = URL(string: string) else {
        return
    }

    webView.load(URLRequest(url: url))
}
We can't generate the PDF until we know the webpage has finished loading, otherwise, we'd just end up with an empty file as output.
In order to detect when loading is finished, we'll need to implement func webView(_ webView: WKWebView, didFinish navigation: WKNavigation!) from WKNavigationDelegate.
extension ViewController: WKNavigationDelegate {
    func webView(_ webView: WKWebView, didFinish navigation: WKNavigation!) {
        // The web view has finished loading the resource, we can now create a PDF
        saveAsPDF(title: webView.title)
    }
}
Creating the PDF
Now, we're finally in a position where we can take the loaded webpage and save it as a PDF in our .downloadsDirectory, .documentsDirectory, etc.
We'll start off by creating a WKPDFConfiguration. This object only exposes one property - rect - that allows us to specify the area of the WKWebView we want to capture.
let pdfConfiguration = WKPDFConfiguration()

/// Using `webView.scrollView.frame` allows us to capture the
// entire page, not just the visible portion
pdfConfiguration.rect = CGRect(x: 0, y: 0, width: webView.scrollView.contentSize.width, height: webView.scrollView.contentSize.height)
If you just wanted to capture the currently visible area instead, you could do something like this:
pdfConfiguration.rect = CGRect(x: 0, y: 0, width: webView.frame.width, height: webView.frame.height)In iOS 14.0+, WKWebView provides a createPDF() that takes in the WKPDFConfigruation we made earlier:
webView.createPDF(configuration: pdfConfiguration) { result in
    switch result {
    case .success(let data):
        // Creates a path to the downloads directory
        guard let downloadsDirectory = FileManager.default.urls(for: .downloadsDirectory, in: .userDomainMask).first else {
            return
        }

        do {
            // Attempts to save PDF and logs an error otherwise
            let savePath = downloadsDirectory.appendingPathComponent(title ?? "PDF").appendingPathExtension("pdf")
            try data.write(to: savePath)

            print("Successfully created and saved PDF at \(savePath)")
        } catch let error {
            print("Could not save pdf due to \(error.localizedDescription)")
        }

    case .failure(let failure):
        print(failure.localizedDescription)
    }
}
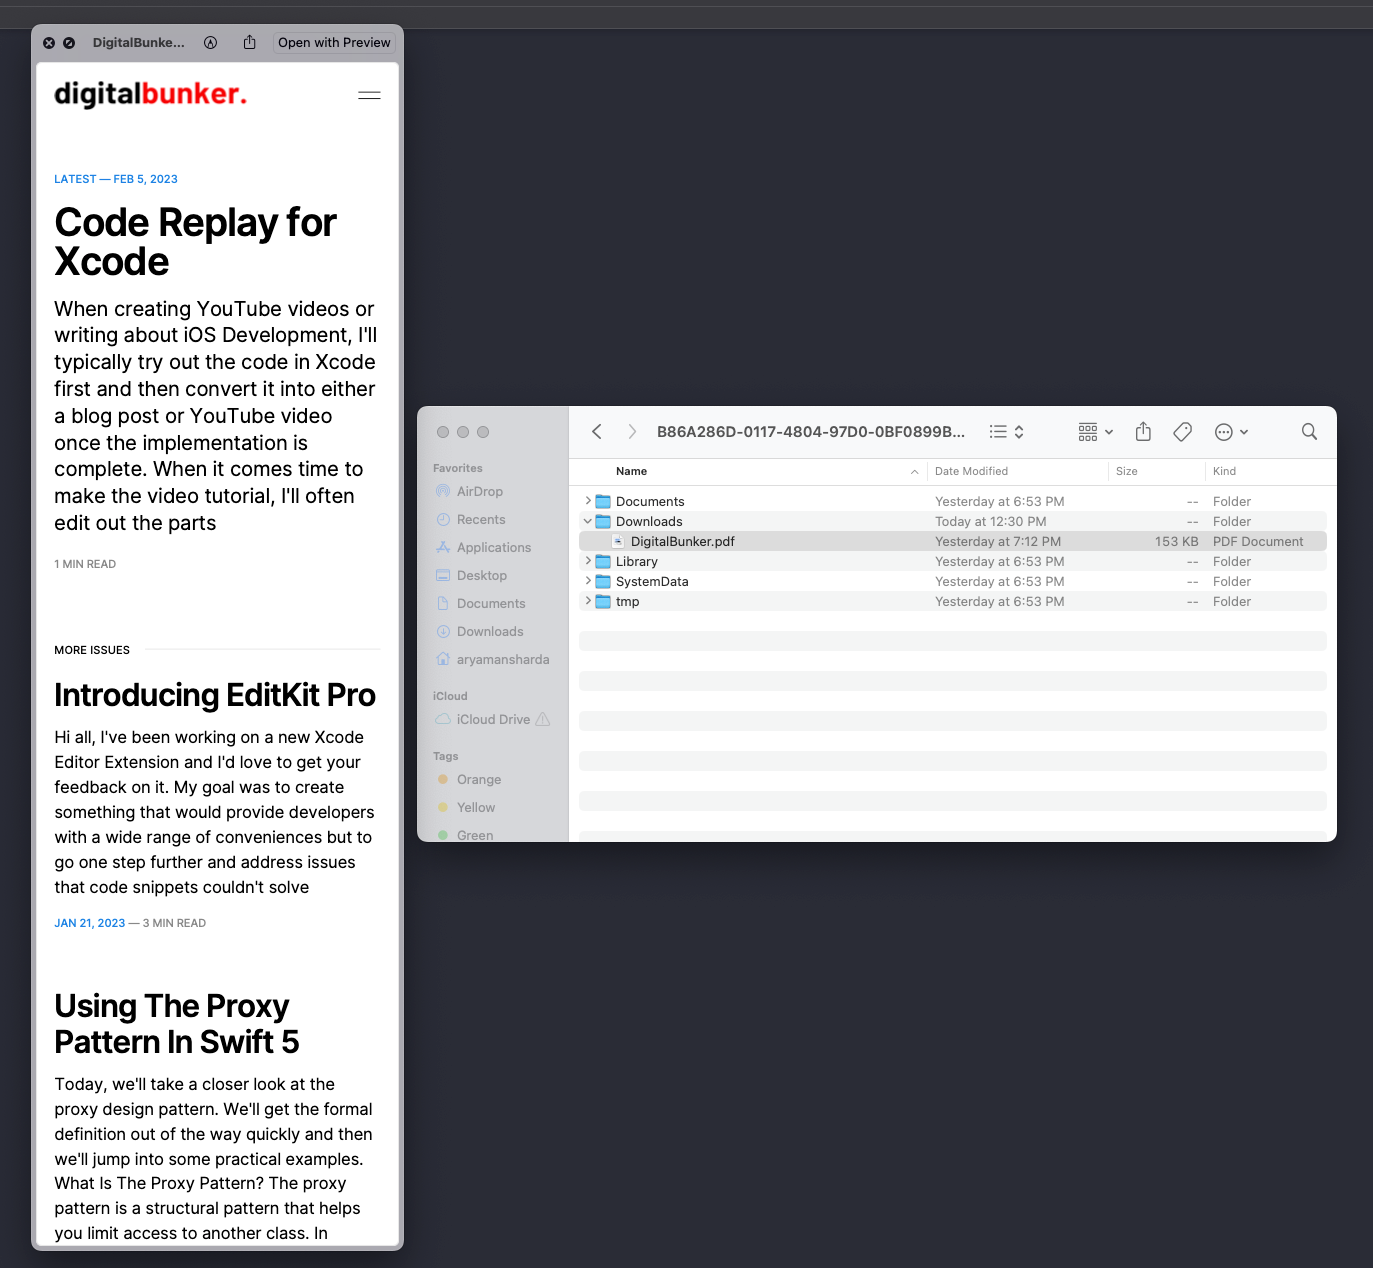
And, we'll now have our exported PDF available in our device's downloads directory:
webView.scrollView.contentSize, we get the full contents of the webpage, not just the currently visible portion.
You can find the source code for this article here.
If you're interested in more articles about iOS Development & Swift, check out my YouTube channel or follow me on Twitter.
And, if you're an indie iOS developer, make sure to check out my newsletter! Each issue features a new indie developer, so feel free to submit your iOS apps.
