
How I Created LowPolygonArt.com
During the summer of 2017, I had a few weeks to kil before I began my new job at Porsche. So, as usual, I made some popcorn, sat down on the couch, and turned on my Roku Smart TV.

During the television’s boot sequence, the polygon background image caught my eye.
At the time, I was already curious about generative art and thought it would be fun to try and develop an algorithm to create these patterns myself.
Since I had some Photoshop scripting experience, it seemed like a reasonable implementation choice. I would be able to make arbitrary selections on the canvas, poll each pixel color, easily measure the image width and height, manipulate individual sections of the canvas, and export each image all programmatically.
My initial approach was simply to create some number of vertices over the image at random locations, group those vertices into triangles, and then fill those triangles with the average colors of those pixels contained within.
By increasing the number of vertices, the individual triangles become smaller, but the overall image becomes more detailed. In a way, it’s like saying the more vertices you have, the more “pixels” you’ll get in the output image.
The art style is intended to be “low resolution”, so you are welcome to choose the number of vertices that suit your artistic tastes.
This naive approach led to some half-decent images, but since the triangles were generated randomly, they were usually very thin, overlapping, and irregular.
It struck me that part of what made low-polygon art so compelling was the general uniformity of the triangles in the image; I knew I needed to create them in a more intelligent way. So, after further research, I stumbled across the Delaunay Triangulation.
Algorithm
The easiest way to understand the Delaunay Triangulation is to look at the following example. Initially, we can see a series of vertices which are merged into triangles with circles superimposed.

You’ll notice, however, that every circle contains a triangle, and each circle only contains the vertices of the specific triangle it contains. Or more formally, the triangulation has no vertex within the circumcircle of any triangle.
In geometry, the circumscribed circle or circumcircle of a polygon is a circle that passes through all the vertices of the polygon.
Consequently, the Delaunay Triangulation allows us to reduce the number of thin and irregular triangles.
This short video does a fantastic job of further explaining how the algorithm works.
Examples
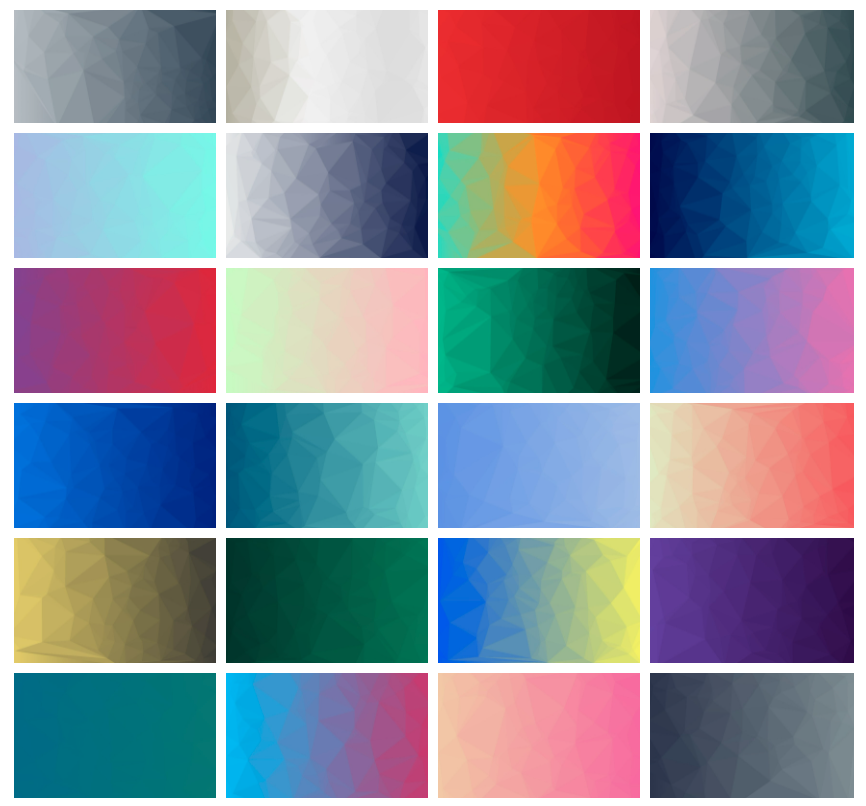
Several hours later, I had the basic algorithm ready. I could supply any input image, some number of vertices, and I’d receive images that looked like this:

You can find more examples on LowPolygonArt.com.
Launching
All I had to do now was to create content and host it on a website.
Around the same time, I had come across UIGradients on ProductHunt which featured a great collection of beautiful gradients.
Using a script, I went through the collection and downloaded the full collection of free images.
Then, using a custom Photoshop batch action, I ran my custom script over all of the downloaded UIGradients images at different levels of detail (number of vertices).
Eventually, I ran the script five times on each photo to produce the 100, 200, 300, 400, and 500 vertices output images I eventually posted on the site.
It took my laptop the better part of the next few days to generate all of the images. However, as part of this post, I’ve rewritten this algorithm in Python, and it’s an order of magnitude faster now.

Fortunately, lowpolygonart.com was available and I was able to secure it for under $20. The website’s SEO-friendly name has helped to ensure sustained traffic to the site over the last few years.

After seeding the site with thousands of free images, I launched it on ProductHunt. Even now, it continues to be my best-performing launch, reaching the #5 “Product of the Day” spot. #humblebrag
Open Source
The original implementation, though open-source, was inaccessible for anyone without Photoshop. It was an obvious shortcoming, but I didn’t fully recognize it at the time.
In the process of writing this blog post, I’ve ported the tool to Python, which should not only make it more performant but also easier to use.
Check out the code below or the full project on GitHub.
All you need to do is enter a filename and the number of vertices you would like in the output image and the script will handle the rest.
Hope you enjoyed this article! If you’re interested in iOS development, please check out my new YouTube channel. Otherwise, sign up for my mailing list below and I’ll see you next time.