
Bresenham's Line Algorithm

I took a Computer Graphics course during college, and I've been revisiting the subject. During this recent exploration, I came across something interesting: Bresenham's Line Drawing Algorithm. It's a straightforward and extremely clever method for drawing lines on a pixel-based display.
Let's take a closer look at how the algorithm works and we'll even implement it from scratch in Swift.
Overview
Bresenham's algorithm - a fundamental method in Computer Graphics - is a clever way of approximating a continuous straight line with discrete pixels, ensuring that the line appears straight and smooth on a pixel-based display.
The algorithm calculates which pixels to color in order to create a straight line between two points. Since it works exclusively with integer arithmetic, it avoids the need for costly floating-point calculations and is better suited for hardware-constrained environments. Not to mention, it's also more accurate than simply rounding coordinates to the nearest pixel.
Algorithm
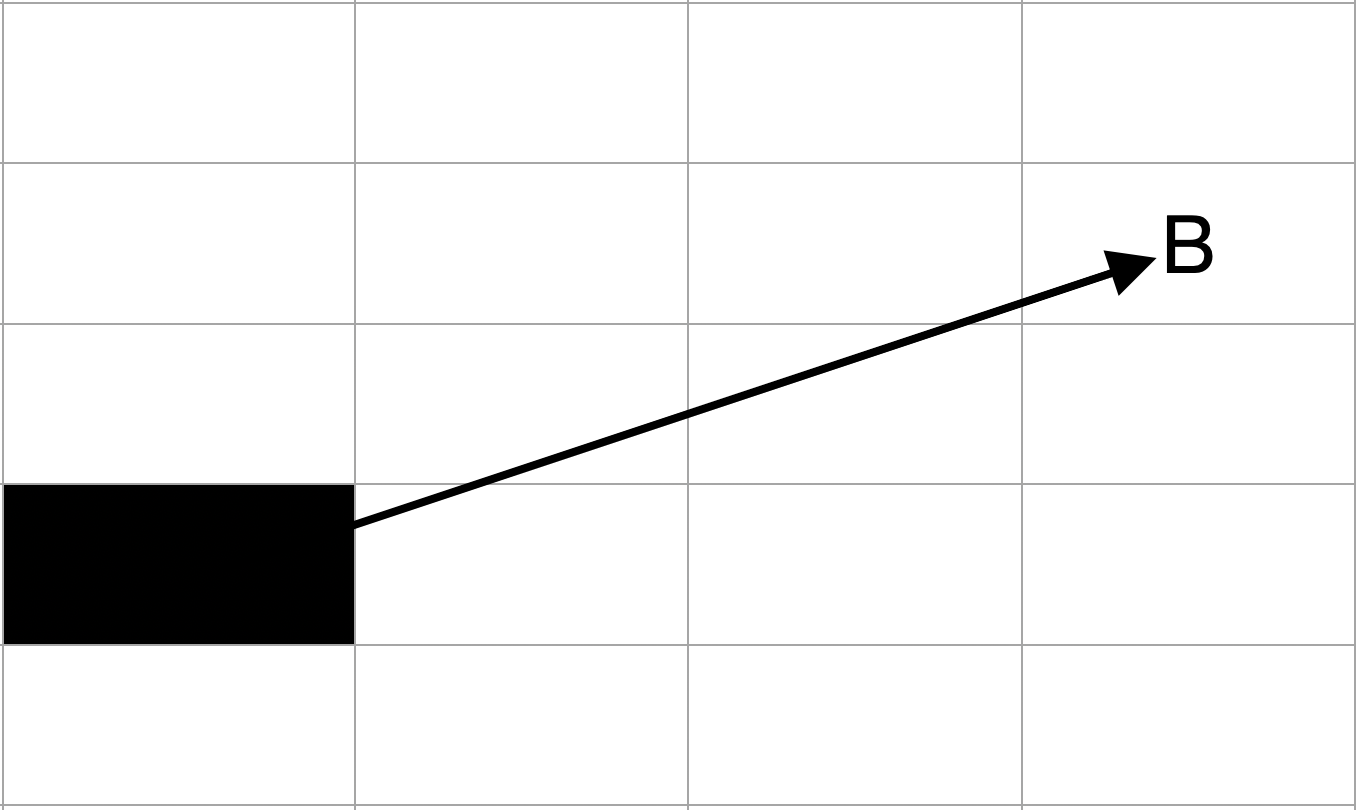
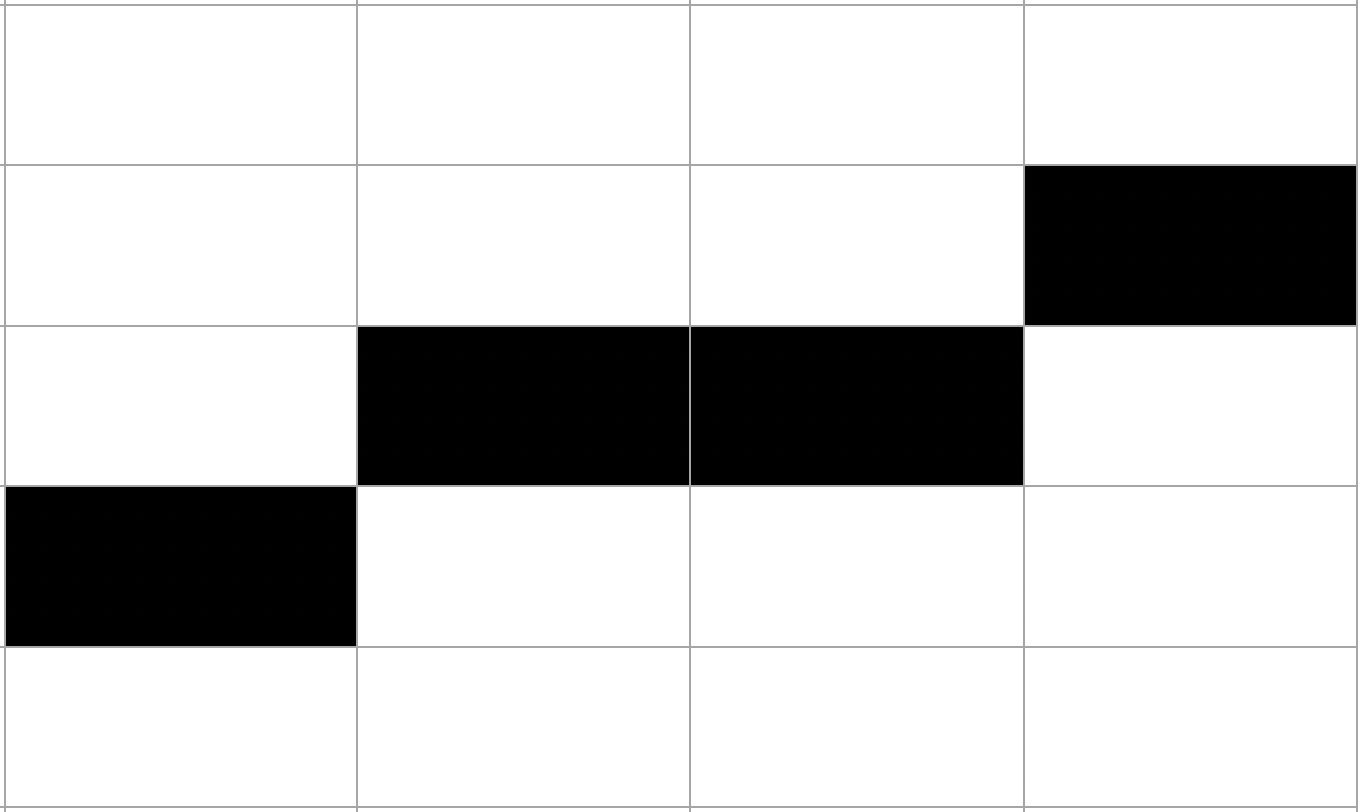
Imagine you have a grid of square pixels, and you want to draw a line between A and B.
The line intersects pixels at odd angles which makes it a challenge to determine precisely which ones to color for the most accurate straight-line representation.

A is at X = 1, Y = 2. B is at X = 4, Y = 4.
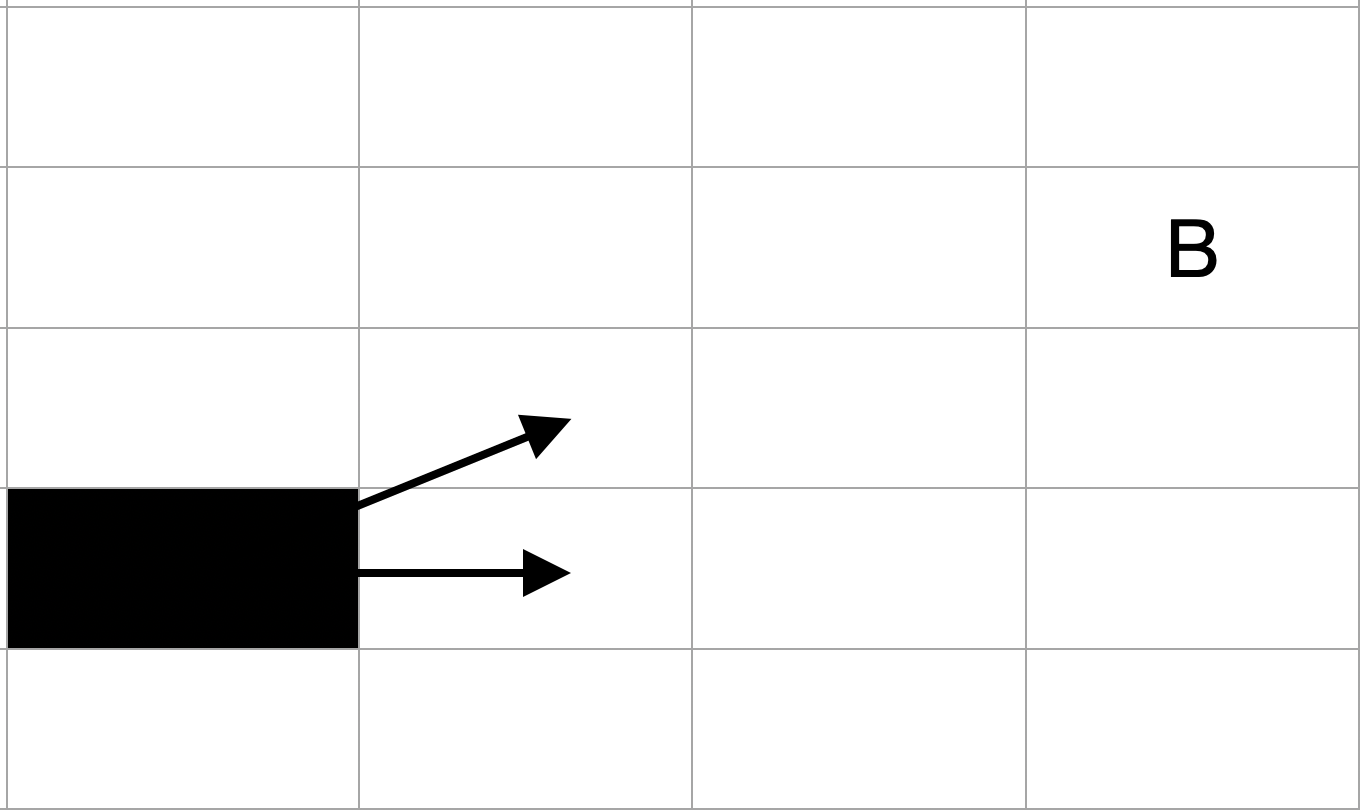
At a minimum, it's safe to assume that we should color our starting pixel. So, let's proceed and do just that:
Now, for our next step, we need to decide whether to move only along the X-axis or if we should also move diagonally (horizontally and vertically) towards B.
Bresenham's algorithm uses the slope of the original line along with a value called the "decision parameter" (which we'll explore shortly) in tandem to help us choose the pixels that create the most precise straight-line approximation between these two points.
We'll begin by calculating the slope of the line between A and B:
Slope = Rise / Run = ΔY / ΔX = (4 - 2) / (4 - 1)
Slope = 2 / 3 = 0.66
The key point to note is thatΔY = 2andΔX = 3- we'll use these values again shortly.
We'll use theslopevalue in the edge cases section.
Decision Parameter
Our goal is to select pixels in a way that keeps them as close as possible to their positions on the original line. In other words, as we start filling in pixels, we want to minimize the error between the actual line position and the nearest selected pixel position at each step.
This is exactly the problem the decision parameter - P - helps us solve. It guides the algorithm's incremental decisions about whether to move horizontally or diagonally and which pixel to color next.
As the algorithm progresses, we'll continuously update the decision parameter based on whether P was positive, negative, or zero in the previous iteration. This constant refinement helps us minimize the deviation from the original line. If this seems a little abstract, don't worry - it'll make more sense as we work through an example.
This iterative process ensures the line maintains its correct path and has a smooth appearance on the pixel grid.
The derivation of the decision parameter is extremely interesting and simple to follow. For those curious, you can find more info here and here.
Initial State
The formula for the initial value of the decision parameter is:
P = 2 * ΔY - ΔX
where ΔX is the difference in x-coordinates between A and B, and ΔY is the difference in y-coordinates. These values will stay the same throughout the algorithm's run.
We'll also create X and Y values to denote the current coordinate/pixel we're at and we'll initialize them with A's values (the starting point of the line):
X = 1
Y = 2
For All Other States
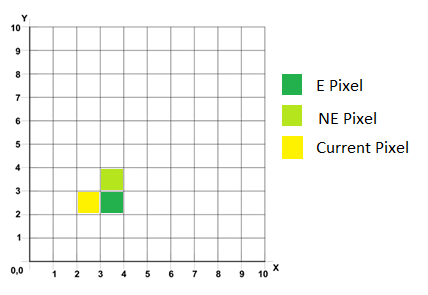
As we move from one selected pixel to the next, we'll make incremental decisions based on the value of P: if P is positive, we move diagonally, and if P is negative, we move only horizontally.
The decision parameter's formula changes slightly for all pixels after the starting one.
If P < 0, we choose the next pixel horizontally and update P using:
P = P + 2 * ΔY
X = X + 1
If P ≥ 0, we choose the next pixel diagonally and update P using:
P = P + 2 * ΔY - 2 * ΔX
X = X + 1
Y = Y + 1
If you want to better understand how we get these formulas, I highly recommend checking out the resources linked below.
As we make these decisions, we update the current position accordingly. For example, if we're moving horizontally, we increment the X-coordinate, and if we're moving diagonally, we increment both X and Y.
Example
Let's return to our starting state:
Let's initialize our decision variable and other starting variables:
P = 2 * ΔY - ΔX = 2 * 2 - 3 = 1
X = 1
Y = 2
We know that we'll at least be coloring in our starting pixel, so let's check that off first.
In our case, since P = 1, according to the rules from earlier:
IfP ≥ 0, we choose the next pixel diagonally and updatePusingP = P + 2 * ΔY - 2 * ΔX.
So, we'll need to increment both X and Y and we'll need to update the value of P for the next iteration:
X = 2
Y = 3
P = 1 + 2 * 2 - 2 * 3 = -1
Now, we can incrementally create our pixel-based line by repeating this process:
- Fill in the pixel at (X, Y).
- Calculate the updated value of
P. - Calculate the updated value of (X, Y).
- Repeat until (X, Y) matches the line's end position.
Iteration 2
Let's color in the pixel we're currently visiting (2,3) :
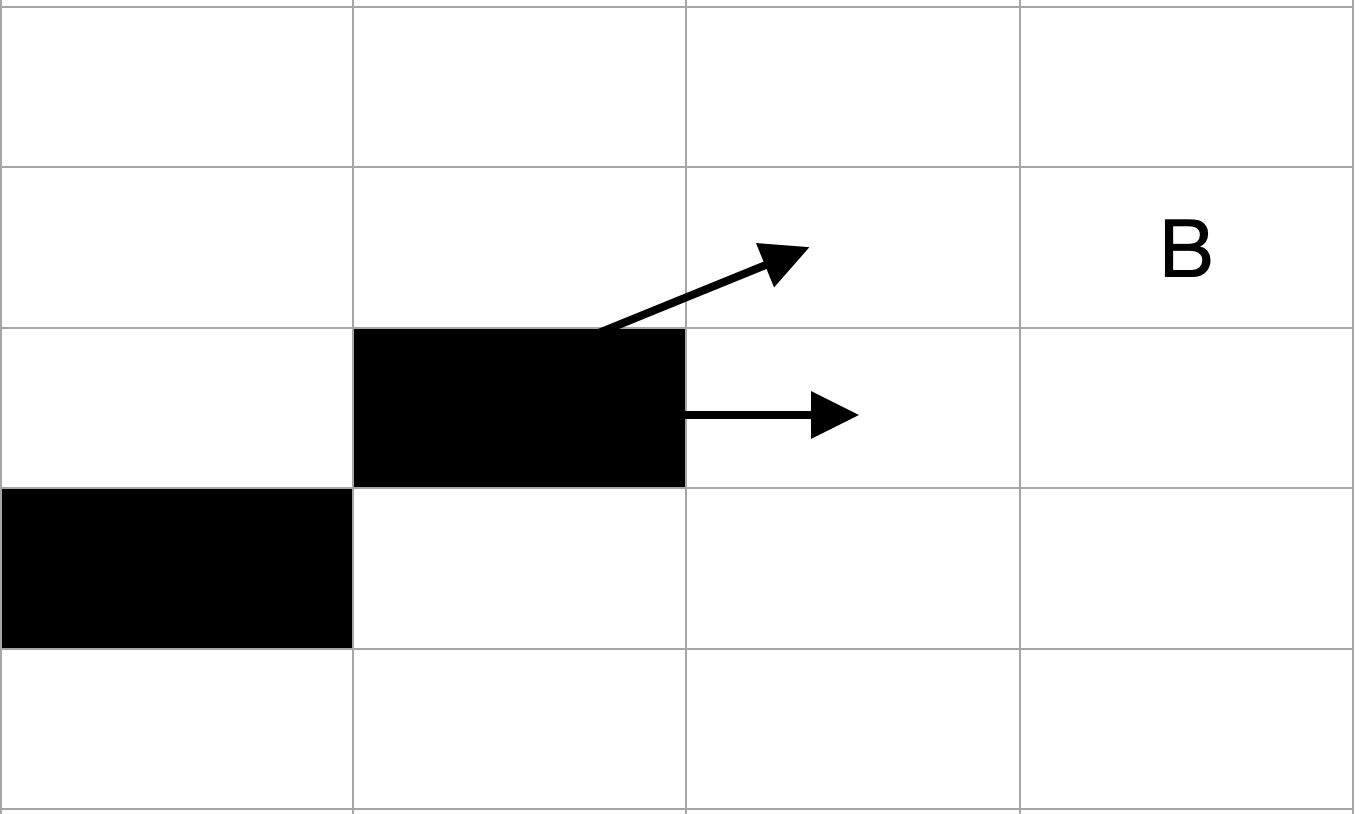
Now, we just repeat the process with P < 0 this time:
P = P + 2 * ΔY
P = -1 + 2 * 2 = 3
And, following the rules we defined earlier since P is less than 0, we only move horizontally:
X = 3
Y = 3
P = 3
Iteration 3
We'll color the pixel at our new (X, Y) position just like before:
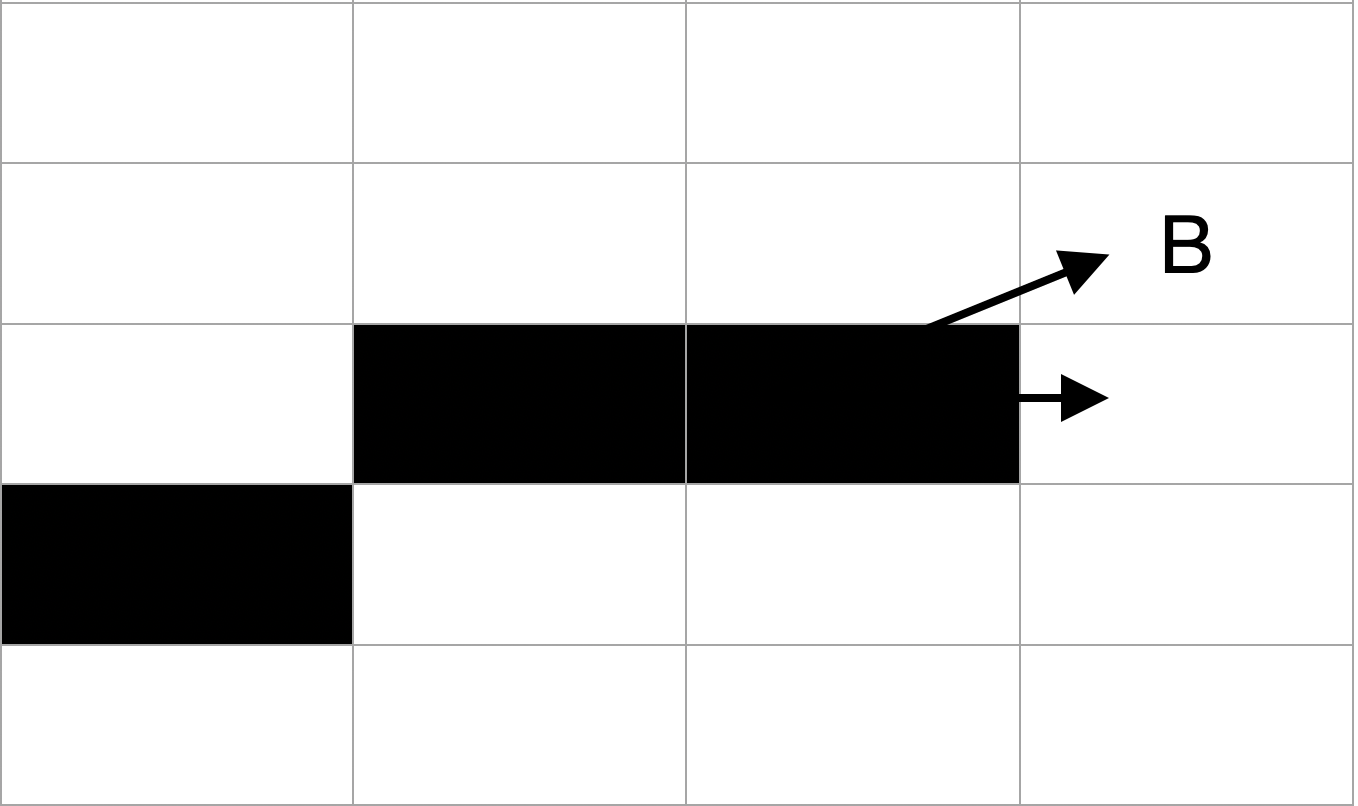
Since P > 0:
P = P + 2 * ΔY - 2 * ΔX
P = 3 + 2 * 2 - 2 * 3 = 1
According to the rules from earlier, we know that our next move will be a vertical and horizontal move, so our values leading into our final iteration are:
X = 4
Y = 4
P = 1
Final Iteration
After filling in the pixel, we can terminate the algorithm since our X and Y values match the end position of the line.
The line was drawn using only basic mathematical operations like addition, subtraction, and multiplication by 2 (which can be efficiently done with bit shifting) - this is one of the key reasons why this algorithm is so fast and efficient.
Implementation
func drawLine(x1: Int, y1: Int, x2: Int, y2: Int) {
    let dy = y2 - y1
    let dx = x2 - x1
    var d = 2 * dy - dx
    var x = x1
    var y = y1

    while x <= x2 {
        print("Draw pixel at: (\(x),\(y))")

        x += 1

        if d < 0 {
            d += 2 * dy
        } else {
            d += 2 * (dy - dx)
            y += 1
        }
    }
}

// Input
drawLine(x1: 1, y1: 2, x2: 4, y2: 4)

// Output
Draw pixel at: (1,2)
Draw pixel at: (2,3)
Draw pixel at: (3,3)
Draw pixel at: (4,4)
Edge Cases
So far, we've only talked about situations where X1 (starting point) < X2 (ending point) and where the slope is between 0 and 1.
There are several cases we haven't handled:
- X1 > X2
- Slope < 0
- Slope > 1
Anusha's post provides a thorough explanation of these edge cases:
Conclusion
Bresenham's algorithm excels in both speed and ease of implementation. However, it doesn't address aliasing.
As a result, many implementations opt for Xiaolin Wu's algorithm, which offers support for aliasing operations.
If you're interested in a deep dive into that, let me know!
If you're interested in more articles about iOS Development & Swift, check out my YouTube channel or follow me on Twitter.
And, if you're an indie iOS developer, make sure to check out my newsletter! Each issue features a new indie developer, so feel free to submit your iOS apps.
Sources
- https://en.wikipedia.org/wiki/Bresenham's_line_algorithm
- https://www.cs.drexel.edu/~popyack/Courses/CSP/Fa18/notes/08.3_MoreGraphics/Bresenham.html?CurrentSlide=2